What Exactly Is a Built-In Entertainment Center?
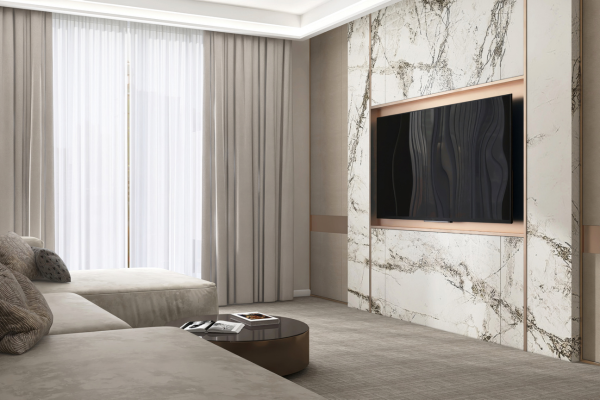
A built-in custom entertainment center is a custom (or semi-custom) media wall that’s attached to your home’s structure. Instead of a standalone TV console, think of a tailored storage-and-display system that looks like your house was designed around it. It can stretch wall to wall, wrap a fireplace, sit snug in an alcove, or float elegantly above the floor.
How It Differs from a Store-Bought TV Stand
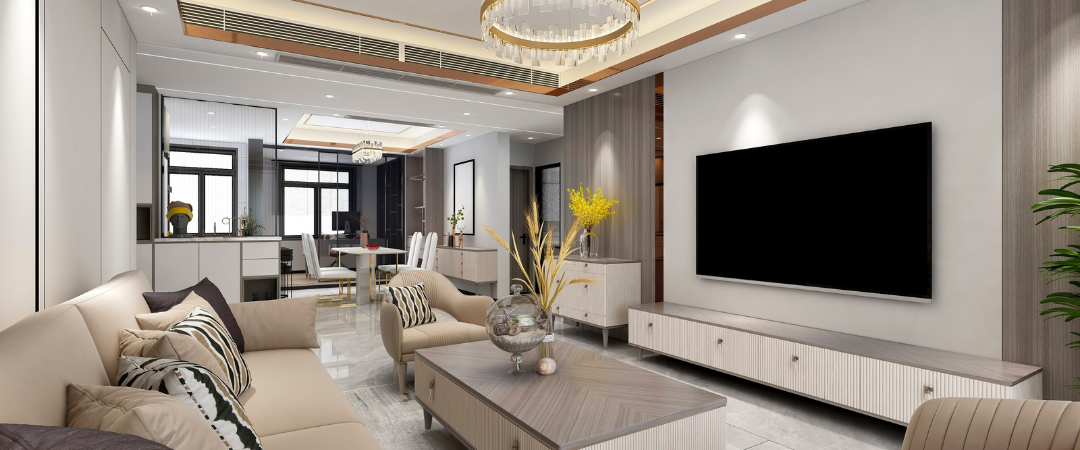
A typical TV stand is a piece of furniture you push against a wall. A built-in becomes the wall—visually and functionally. You get clean lines, intentional symmetry, and storage that fits your life (and gear) perfectly. Bonus: no awkward gaps for dust bunnies or cable tangles.
Core Components (Frames, Shelves, Doors, Lighting)
Most designs include a lower cabinet run (for gear and games), a center niche for the TV, flanking towers or shelves, and upper cabinets or bridged shelving. Add lighting, cord channels, speaker cavities, and venting—and you’ve got a serious home upgrade.
The Style Upside
Seamless, Architecturally “Built-In” Look
Built-ins read as part of your architecture. They align with door trim, echo window proportions, and wrap awkward corners so everything looks “meant to be.” It’s the difference between a suit off the rack and one tailored to your shoulders.
A Strong Focal Point Without Visual Clutter
Every room needs a focal point. A built-in frames your TV (and decor) so the eye has a place to land—without the visual noise of wires, random boxes, and mismatched furniture.
Fits Any Aesthetic—Modern, Transitional, Farmhouse, or Minimal
- Modern: slab doors, push-to-open hardware, matte paint, linear lighting.
- Transitional: slim Shaker profiles, satin finish, warm wood accents.
- Farmhouse: beadboard back panels, rustic stains, classic cup pulls.
- Minimal: floating cabinets, no visible hardware, integrated channels.
The Storage Superpower
Hidden vs. Open Storage (and When to Use Each)
- Hidden: Perfect for routers, game consoles, remotes, and kids’ stuff. Doors or drawers keep the look calm.
- Open: For books, art, and heirlooms. Use sparingly to avoid visual clutter.
Cord, Console, and Speaker Management
Plan for a dedicated raceway behind the TV niche, ventilated cabinets for receivers, and fabric or slotted door panels where IR signals and airflow matter. Pre-drill grommets between compartments so adding a new device later isn’t a hassle.
Multi-Room Uses: Living Room, Bedroom, Basement, Office
They’re not just for the family room. Think compact built-ins with a small TV in the bedroom, a toy-taming unit in the playroom, or a hybrid media-library wall in a home office.
Planning Basics for your Entertainment Center
Measure Your Room Like a Pro
Grab width, ceiling height, and depth—twice. Note outlets, returns, baseboards, and any uneven walls (old houses, we see you). If your ceiling varies, a small scribe molding or a finished top panel hides gaps.
Popular Layouts (Media Wall, Fireplace Wrap, Alcove, Corner)
- Media Wall: The classic wall-to-wall look.
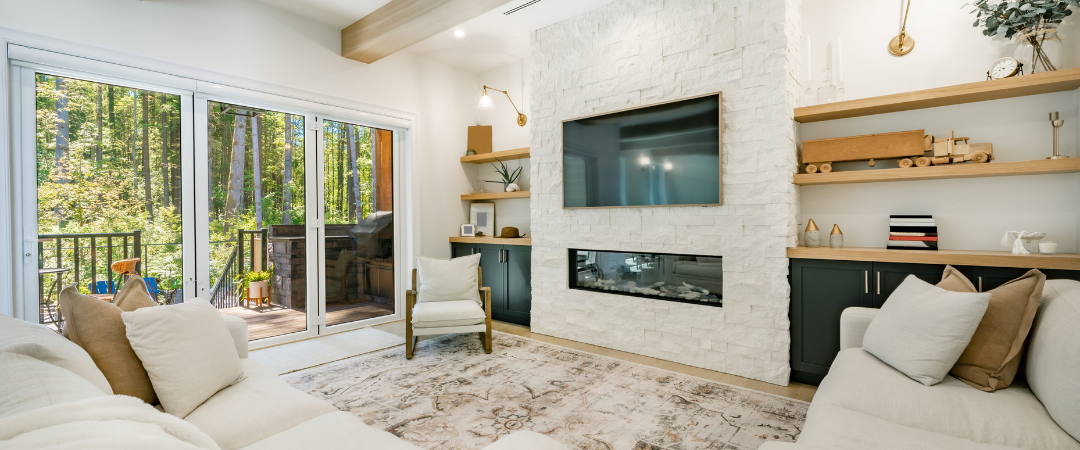
- Fireplace Wrap: Built-ins flank or surround a fireplace—gorgeous, but mind the heat.
- Alcove: Custom boxes slide perfectly into recessed niches.
- Corner: Angled or L-shaped units maximize tricky corners.
Sizing for Today’s TVs (and Tomorrow’s), Ventilation & Access
Allow 2–3″ clearance side-to-side and 3–4″ above the TV for airflow and future upgrades. Provide rear access (a removable back panel or side hatch) so you don’t have to unmount the TV to reach a cable.
Ergonomics: Viewing Height, Door Swing, and Reach
Center your screen roughly at eye level when seated (typically 42–48″ to the center). Check door swings so they don’t block walkways, and keep daily-use items between knee and shoulder height.
Materials & Finishes That Matter When Creating Your Entertainment Center
Painted vs. Stained, Matte vs. Satin
Painted finishes feel crisp and contemporary; stained wood adds warmth and grain. Matte hides fingerprints but can scuff; satin balances cleanability with a soft sheen.
Hardware Choices: Minimal, Statement, or Invisible
Bar pulls in brushed brass, low-profile edge pulls, or push-latches—hardware is your jewelry. Choose something that supports your style and hand feel.
Material Comparison for Built-Ins
| Material | Pros | Cons | Best Use |
|
MDF (paint-grade) |
Smooth paint finish, budget-friendly, stable | Heavy; edges need sealing | Painted doors, face frames, shelves |
|
Plywood (cabinet-grade) |
Strong, lighter than MDF, holds screws well | Visible plies on edges |
Boxes, shelves, structural panels |
|
Hardwood (oak, maple, walnut) |
Premium look, durable, refinishable | Higher cost; movement with humidity |
Stained fronts, accent details |
| Melamine/Prefinished Ply | Easy to clean, uniform | Limited color/texture realism |
Interior boxes, closet-like storage |
Design Entertainment Center Features People Love
Door & Drawer Styles (Slab, Shaker, Glass)
- Slab: sleek, modern, easy to wipe.
- Slim Shaker: timeless, low-profile rails for a refined transitional look.
- Glass: upper display doors with clear or reeded glass add elegance and depth.
Built-In Lighting (Pucks, Strips, Toe-Kick)
LED pucks wash light onto shelves; strip lights along the verticals give a boutique vibe; toe-kick lighting makes a floating “halo” at night. Put them on dimmers for movie-night magic.
Speaker Grilles, Sound Transparency & Acoustics
Use fabric panels or perforated grilles where speakers live. Keep subs decoupled from the cabinet to prevent rattles, and avoid fully enclosing hot receivers—give them room to breathe.
Fireplace Integration Done Right
Maintain clearances per the fireplace manual. Use a proper mantel/shelf to deflect heat away from the TV and electronics, and incorporate heat-resistant materials near the firebox.
Floating vs. Floor-Based Units
Floating cabinets feel light and modern (and simplify cleaning). Floor-based units deliver maximum storage and classic permanence. Both can be stunning; choose what suits your architecture.
Budgeting & Timeline for Entertainment Centers
Factors That Drive Cost (Size, Materials, Complexity)
Overall width and height, number of doors/drawers, wood species, glass, lighting, and specialty work (like fireplace integration or curved profiles) are the big cost levers.
Construction Phases: Design → Build → Install → Finish
Expect a design consult, site measurements, shop drawings, fabrication, finishing, installation, and final touch-ups. If painters finish onsite, add a few days of drying/curing.
Budget & Timeline Snapshot
|
Scope |
Typical Width | Materials/Finish | Ballpark Cost (USD) |
Timeline |
|
Compact media wall |
6–8 ft | Paint-grade MDF + ply, slab fronts | $2,500–$5,500 | 2–4 weeks |
|
Standard living room |
9–12 ft | Mix of ply + hardwood, Shaker fronts, basic lighting | $6,000–$12,000 |
4–8 weeks |
|
Fireplace wrap |
10–14 ft | Heat-aware design, mantel, venting | $8,000–$16,000 |
5–9 weeks |
| Statement wall | 13–18+ ft | Premium hardwood accents, glass doors, advanced lighting | $12,000–$25,000+ |
6–12+ weeks |
Note: Local labor and finish complexity can move these numbers up or down.
DIY vs. Hiring a Pro
When DIY Makes Sense
You’re comfortable with accurate measurements, cabinet assembly, and finish work; your layout is straightforward; and you can live with small imperfections (or you’ve got the patience to fix them).
When a Pro Saves You Money (and Headaches)
Complex walls, fireplace integration, uneven floors/ceilings, and advanced lighting or speaker setups are pro territory. A seasoned carpenter or cabinet shop can avoid costly mistakes and deliver a flawless, furniture-grade finish.
Installation—A Step-by-Step Overview
Prep, Framing, Boxes, Face Frames
- Mark & Protect: Mask floors, mark studs, and snap reference lines.
- Set the Base: Level a sub-base or ladder frame so cabinets sit dead-flat.
- Install Boxes: Secure to studs; shim to plumb.
- Add Face Frames & Panels: Align reveals; clamp and fasten carefully.
- Crown, Scribe & Trim: Scribe moldings hide minor wall/ceiling waves.
Electrical & AV Routing, Final Finish
Run power and low-voltage lines before closing the back. Vent hot compartments, then caulk, fill, sand, and paint (or install prefinished components). Fit doors/drawers, align gaps, add hardware, and test lighting.
Styling Like a Designer
Elevate with Balance, Texture, and Negative Space
Use the “triangle method”: cluster decor in visual triangles—tall, medium, small. Mix textures (ceramic, wood, metal, fabric) and leave breathing room so shelves don’t feel jammed.
Cable Boxes, Modems & Smart Hubs (Hidden but Accessible)
Park them behind slotted or fabric panels for airflow and remote pass-through. Use labeled Velcro ties for cords. Add a small pull-out tray where you tinker the most.
Maintenance & Longevity of a Entertainment Center
Caring for Painted vs. Wood Finishes
Dust with a microfiber cloth; spot-clean with mild soap and water. For wood, use non-silicone polish sparingly. Avoid harsh chemicals that dull sheen or lift finish.
Avoiding Warping, Sagging, and Heat Damage
Support long shelves with hidden steel or thicker material. Keep heat-generating gear ventilated. Use felt pads under decor to prevent micro-scratches.
Resale Value & ROI
Built-ins read “custom” to buyers. They photograph beautifully, add storage (always a win), and elevate the perceived quality of your home. Even modest units can help your listing stand out.
Common Mistakes to Avoid When Creating and Building an Entertainment Center
- Too tight for the TV: Leave space to upgrade later.
- No ventilation: Electronics need airflow—build it in.
- Over-shelving: Open shelves everywhere = visual clutter. Mix closed storage.
- Ignoring lighting: Integrated lighting = instant luxury.
- Skipping wire paths: Pre-plan grommets and raceways now; thank yourself later.
Real-World Layout Ideas For Your Entertainment Center (Micro, Standard, and Statement Walls)
- Micro (Apartment/Condo): 6–8 ft floating cabinet, single shelf, light strip.
- Standard Family Room: 10–12 ft with base cabinets, center TV niche, two towers.
- Statement Wall: 15–18 ft symmetrical design, fireplace center, glass uppers, library ladder (why not?).
Final Thoughts & Next Steps
Built-in custom entertainment centers do two big things at once: they make your room look intentional and pulled-together, and they swallow the mess that modern living brings (hello, cords and controllers). Whether you go compact and floating or bold and fireplace-wrapped, a well-planned built-in adds style, storage, and long-term value. Start with honest measurements, target a style that complements your home, and decide if DIY or a pro is the smarter path. Get the fundamentals right and your media wall will feel like it’s always been part of your home—just waiting for the popcorn.
Entertainment Center Most Frequently Asked Questions
‣ How deep should base cabinets be for a built-in entertainment center?
Most base cabinets run 18–24″ deep. If you’re housing receivers or gaming consoles, 20–24″ is safer for airflow and cable clearance.
‣ What’s the ideal height for the TV in a built-in?
Aim to center the screen around eye level when seated—typically 42–48″ to the center. Mount slightly lower for cozy, closer seating; a bit higher if you have a fireplace.
‣ Can I use soundbars or in-wall speakers with a built-in?
Absolutely. Leave a dedicated niche for a soundbar with a few inches of breathing room, or use fabric panels/perforated grilles for in-cabinet or in-wall speakers.
‣ Is MDF strong enough for shelves?
Yes—within reason. Use thicker MDF (¾”–1″) and consider under-shelf stiffeners or hidden steel for long spans. For heavy books, cabinet-grade plywood is a sturdier bet.
‣ Do built-ins work in rentals or only in owned homes?
They’re best for owned homes (they’re attached), but modular, wall-mounted components can deliver a similar look with easier removal—just patch the anchor holes when you move.